Project Overview
Kraftex Pratliglo® can be used to create believable water for use in dioramas and other models. By using Kraftex Decopodge® Sealant with fully cured Pratliglo®, ripples can easily be added to the water’s surface for added effect.
Other Pratley adhesive products can also be used to help create the project. Pratley Quickset® Clear was used to affix marine animals as well as other items in place. A combination of Pratley Putties were also used to as a sculpting medium and to secure items in place.
Start out with a plan
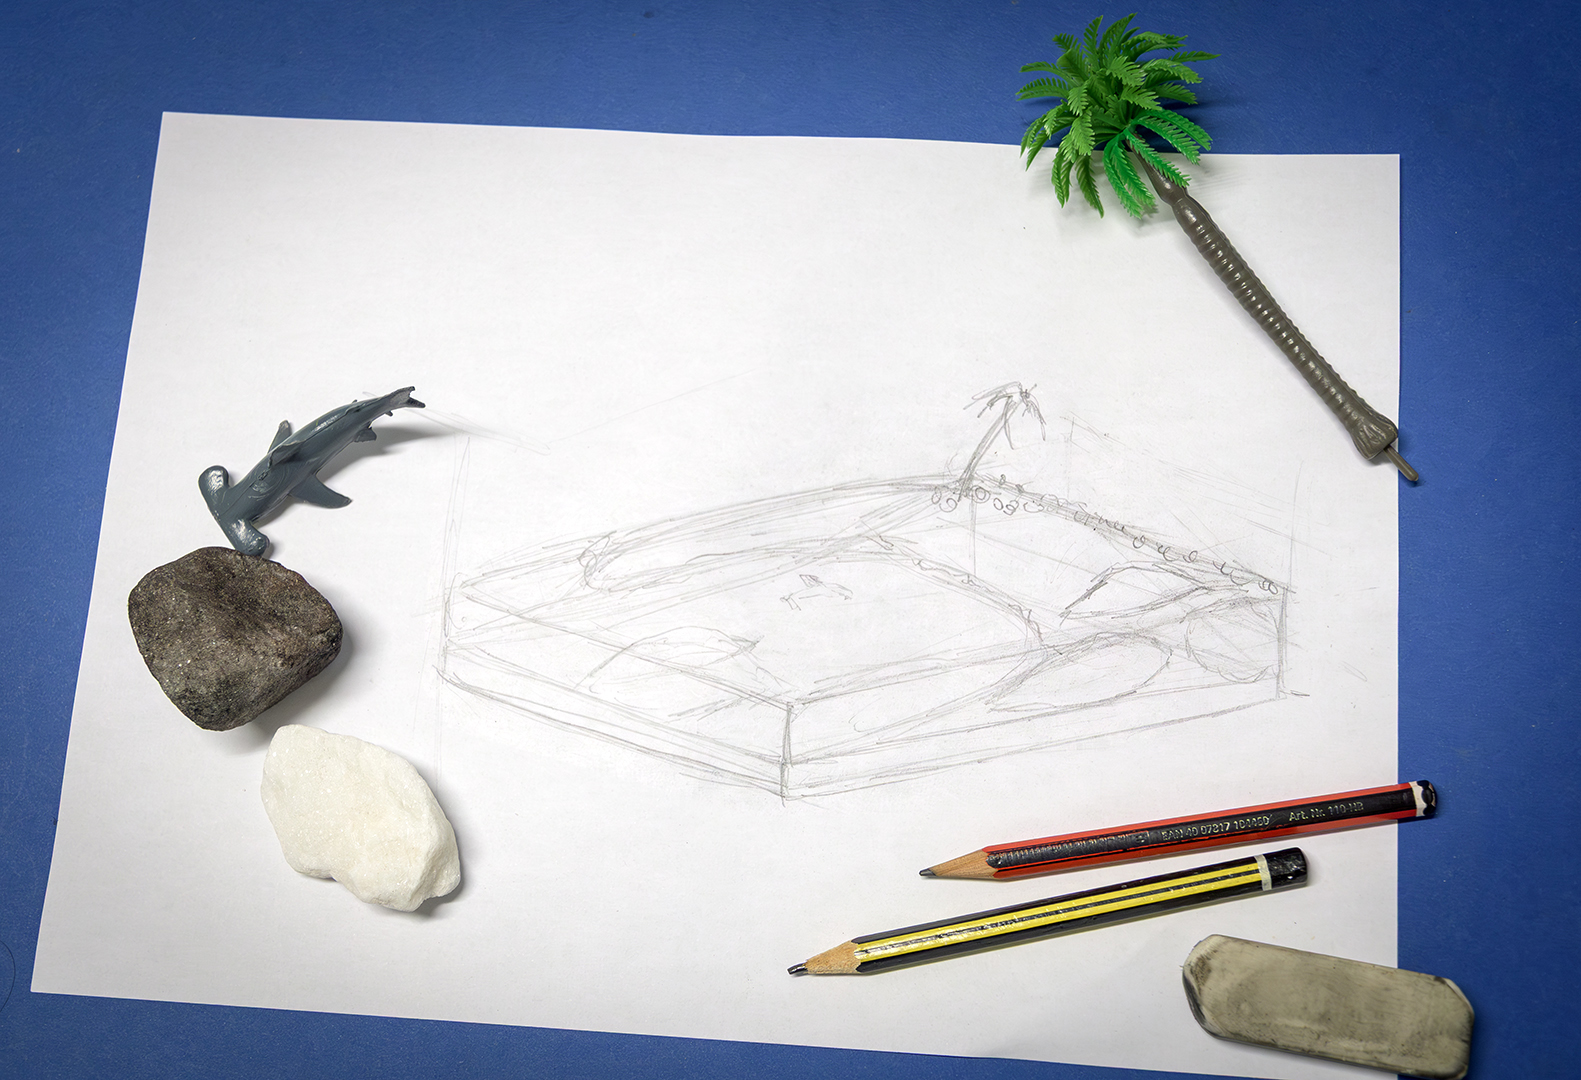
A simple sketch of the project with some of the items used in the diorama.
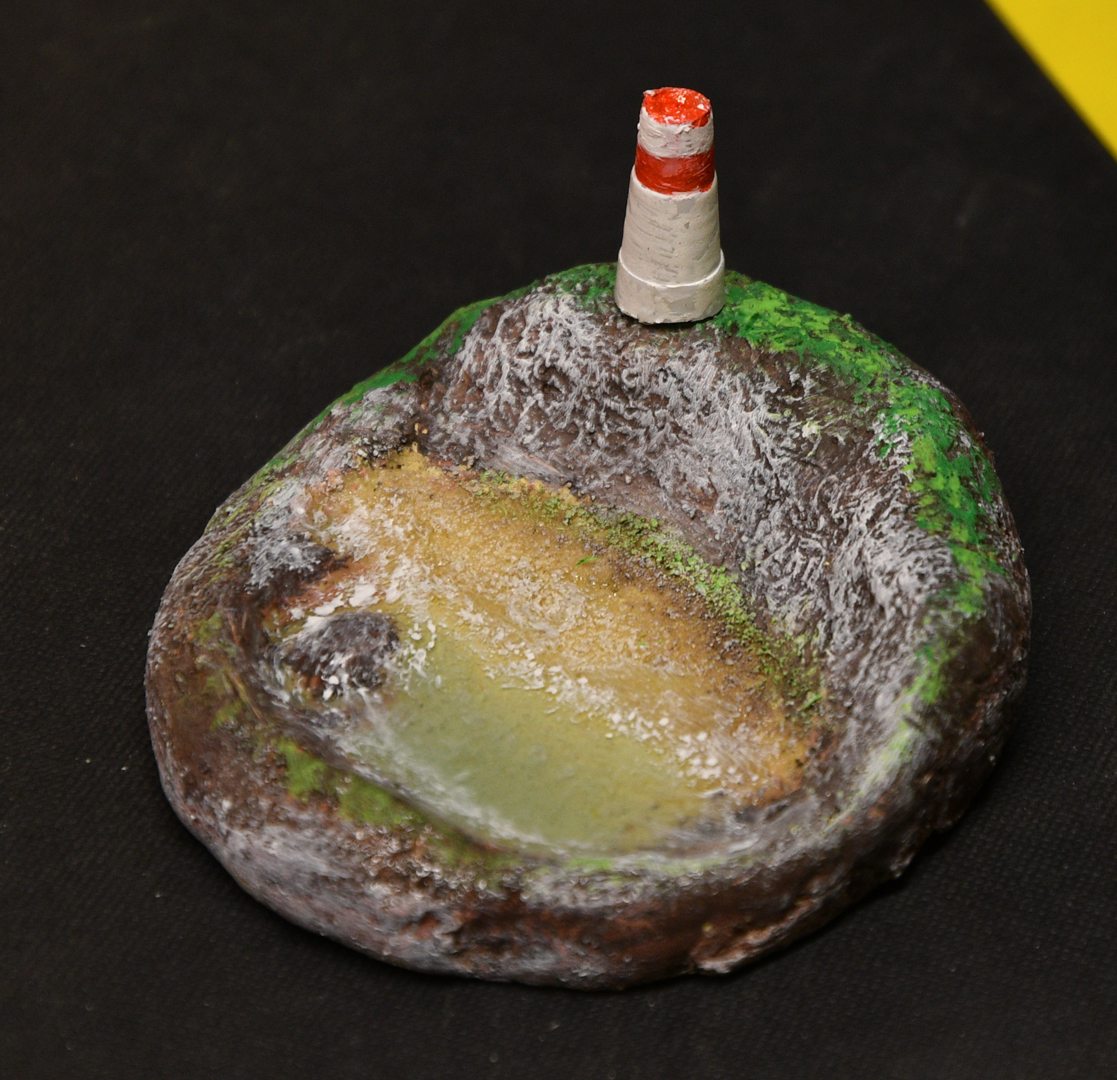
The rocks were originally white and painted darker to be more like ocean rocks.
With all crafts products planning is essential. A small sketch for layout helps to plan out your approach and how you can best use the products you have on hand. Understanding the curing times of the products you have can also help to manage your time and expectations. All of Pratley’s Kraftex products have instructions included which have estimated cure times. Taking this into account helps you to plan out each step.
Test the product
Knowing the product also helps you better understand how it works. Making smaller scale projects and working to bigger projects helps you to familiarise yourself with the products. Getting to know how the product works will help you to plan the best way you can work to achieve the desired result you are after.
A small test project using Pratliglo® and Pratley Standard Setting Putty.
Tinfoil was used to reduce the amount of putty needed for the project
Overview of the Kraftex and Pratley products used in this model:

Pratliglo® is an epoxy resin that sets to a clear finish. It is self-levelling once applied, making it perfect for table tops and flat surfaces. It can be colour tinted with acrylic inks or paints. The resin cures hard and can be sawn, sanded and sealed.
Pratliglo® starts to set within 8 hours. It can be handled in 24 hours and fully cures in 48 hours.
Decopodge® Sealant can be used to seal photographs, newspaper cuttings and any porous substrates. It also helps to seal objects and prevent bubbles from forming when Pratliglo® is applied to a surface. It can also be used as an adhesive to stick down items.
It is a water based sealant that easily washes off hands and brushes.
Starts off white but cures to transparent finish within 15 – 20 minutes.
A Quick setting epoxy adhesive that cures clear. It can be used to adhere a multitude of materials together such as, items made of metal, rock, glass and wood.
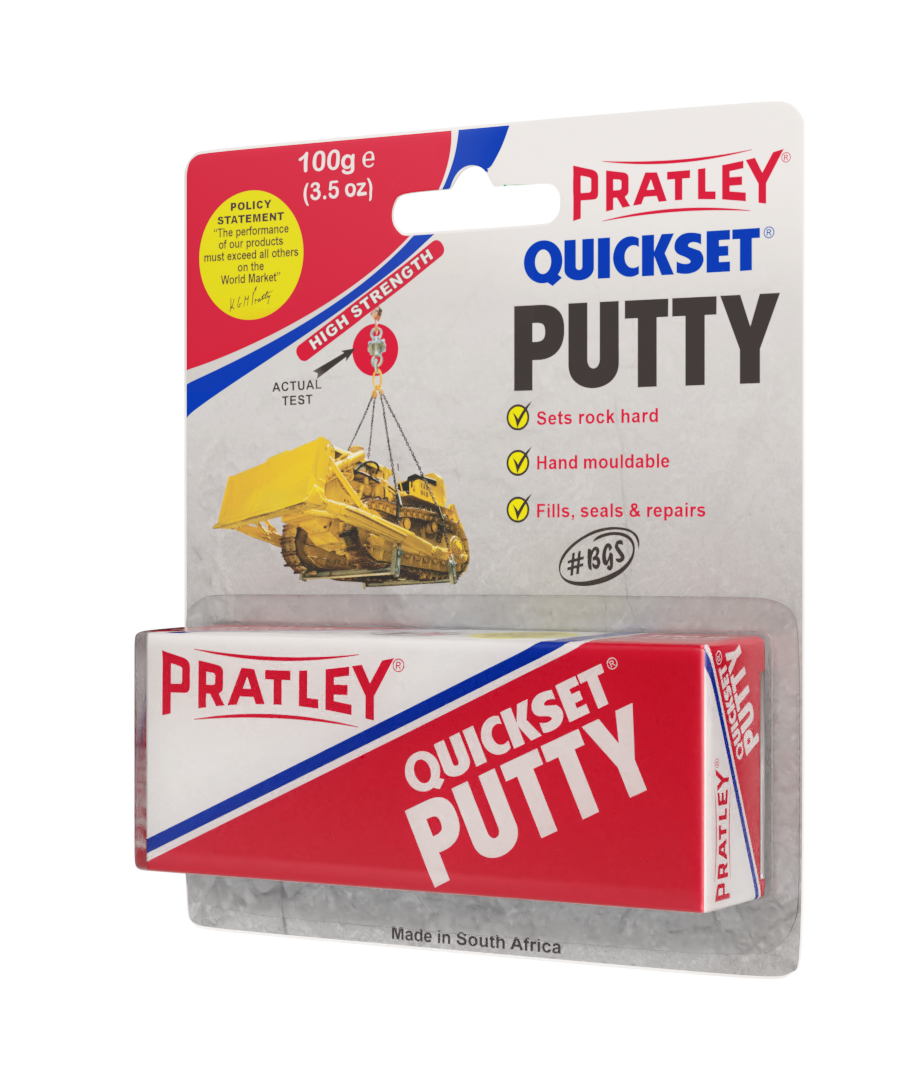
 Hand mouldable epoxy putty adhesive that sets rock
hard. Can easily be smoothed with a wet finger before setting. Can also
set underwater.
Hand mouldable epoxy putty adhesive that sets rock
hard. Can easily be smoothed with a wet finger before setting. Can also
set underwater.
 A quicker setting putty epoxy adhesive. Has the same
properties of Standard Setting putty
A quicker setting putty epoxy adhesive. Has the same
properties of Standard Setting putty
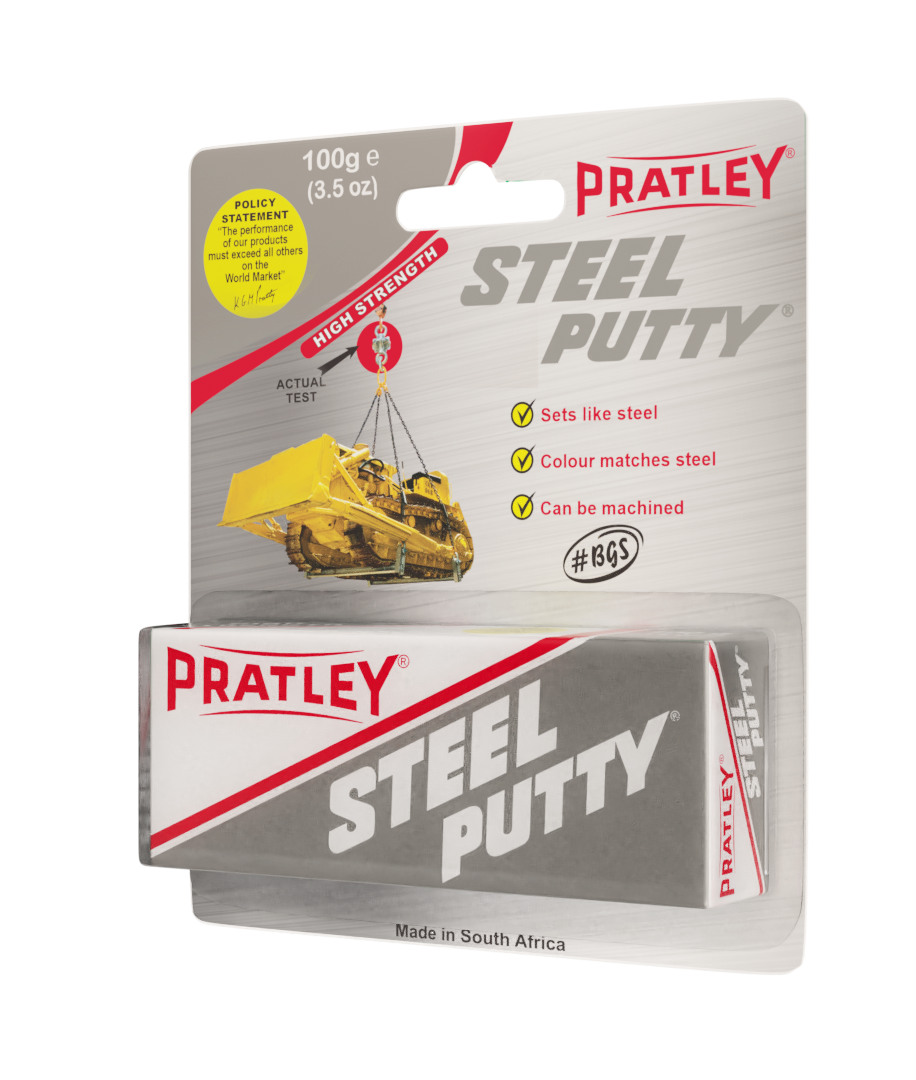 A darker coloured putty that is more suited for
metal repairs. Once set it matches the colour of steel and other ferrous metals. Also resistant to oil, petrol and diesel.
A darker coloured putty that is more suited for
metal repairs. Once set it matches the colour of steel and other ferrous metals. Also resistant to oil, petrol and diesel.
Other items used in the project:
Most of these items can be found at your local craft shop, retailer and hardware store
Newspaper / Tinfoil, Spare wood, Acrylic Paints, Blue acrylic Ink
A wooden tray, Disposable see through cups, Mixing sticks / Tongue depressors
Blue acrylic ink/paint used to colour the Pratliglo® blue
Newspaper or disposable tablecloth to cover the working surface
Masking tape, Paint brushes, Cups for cleaning brushes
A large box to cover the model during the curing process
Cotton, A pair of scissors
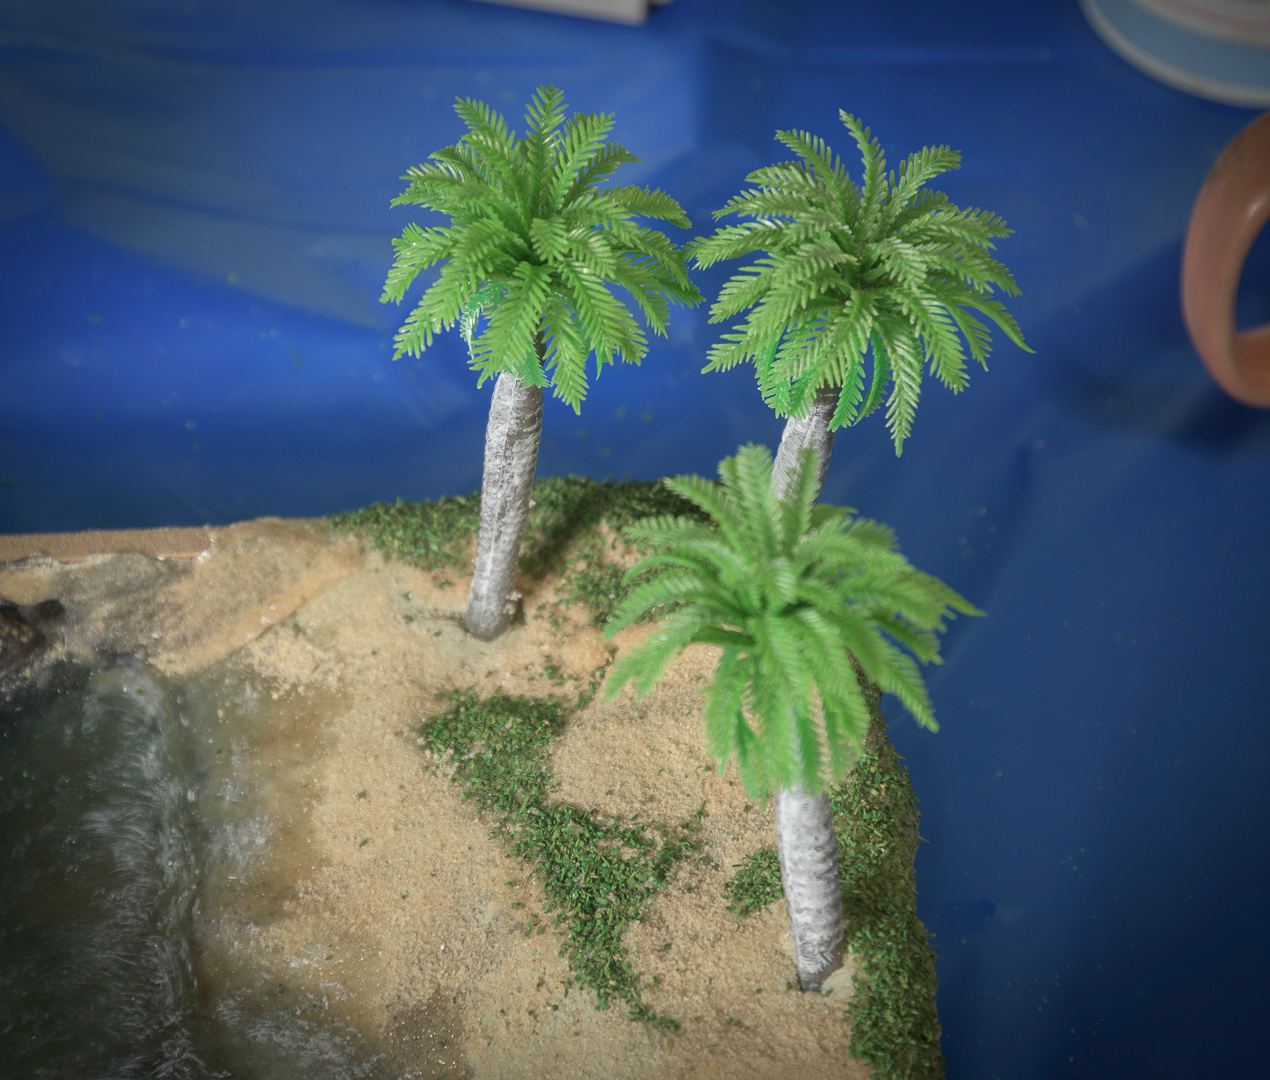
Green modelling scatter, Sea sand (For this project sandpit sand was used), Model trees and marine animals, Small white rocks
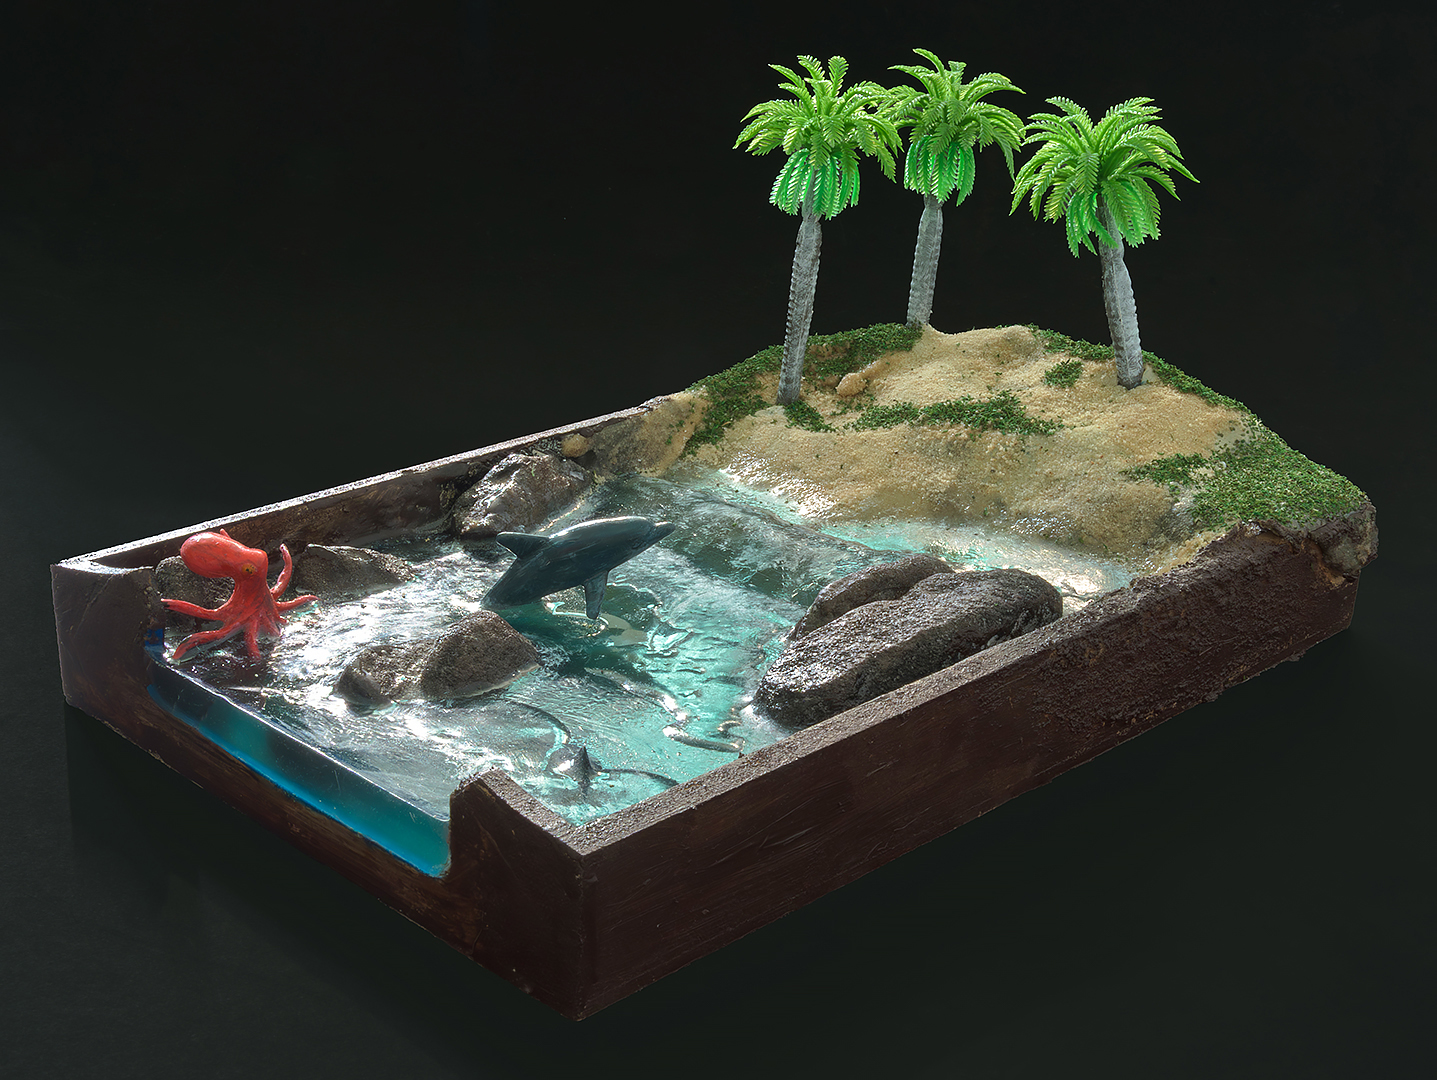
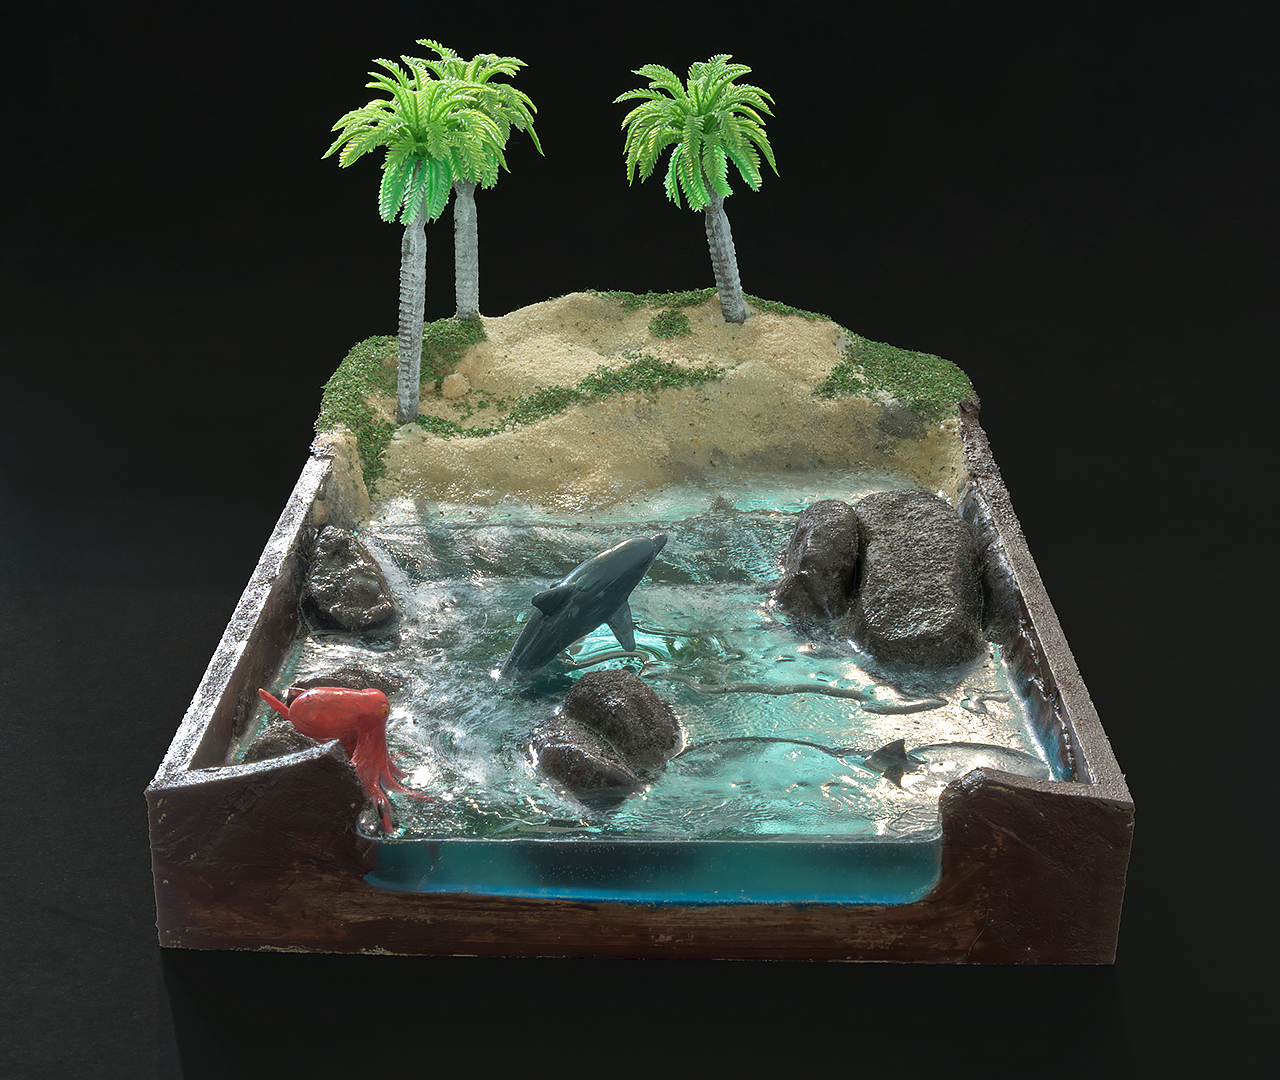
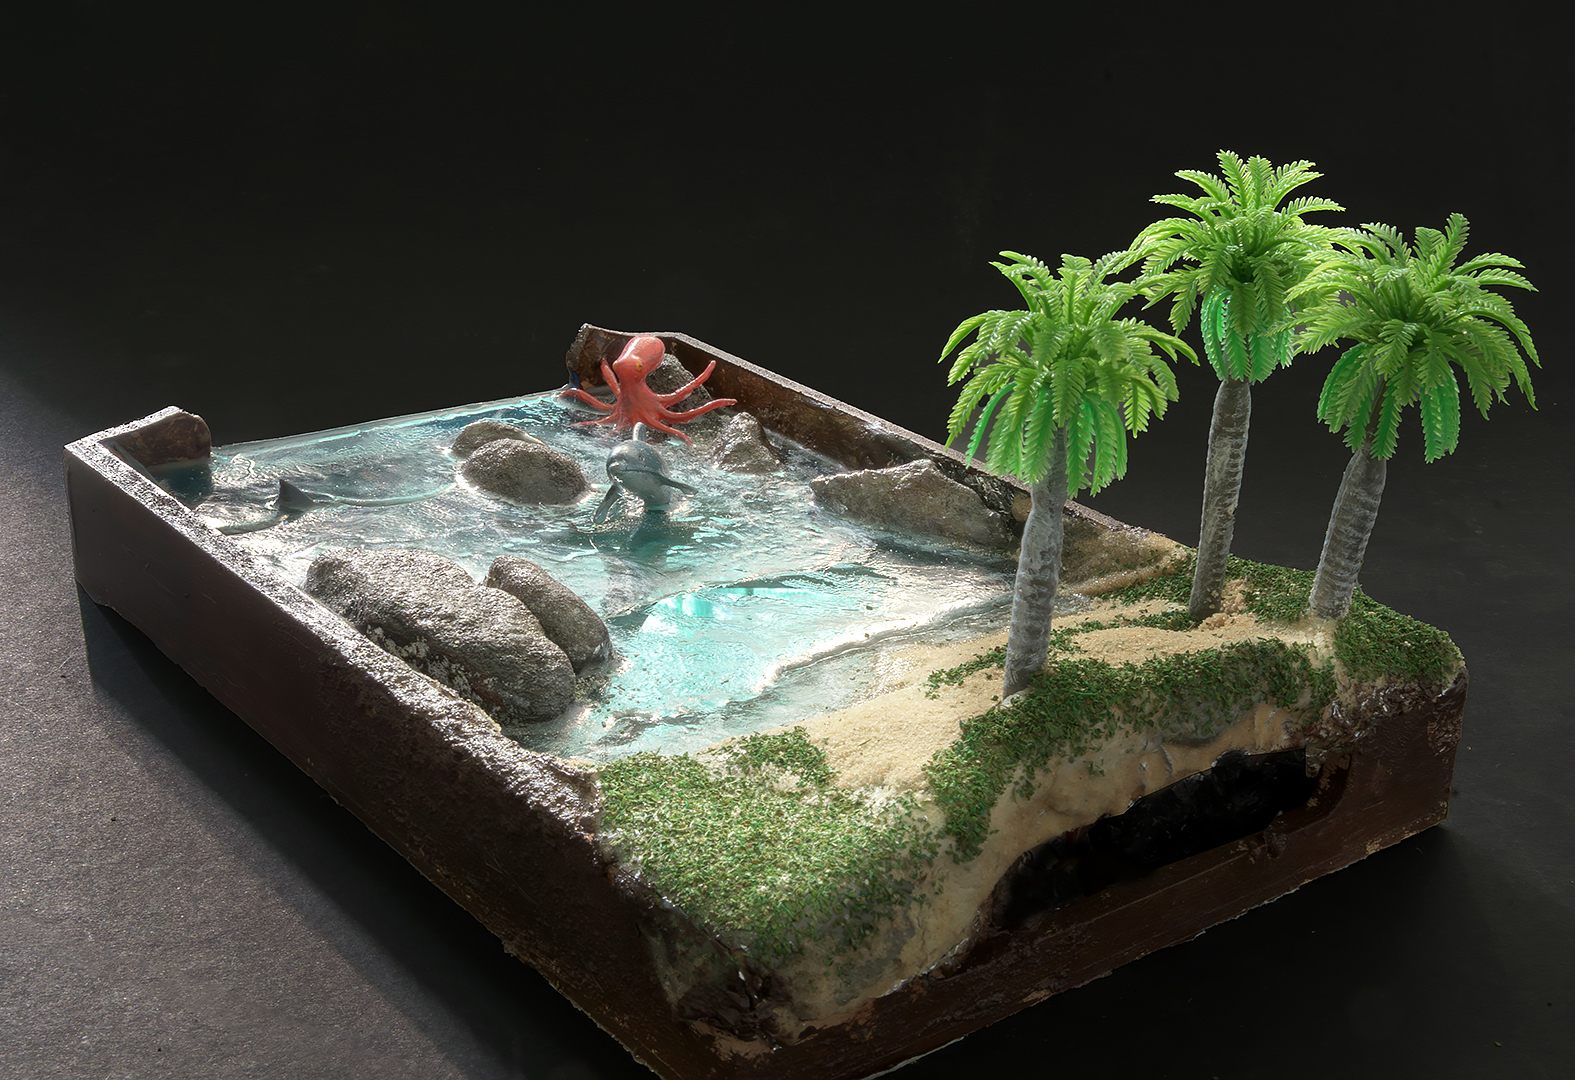
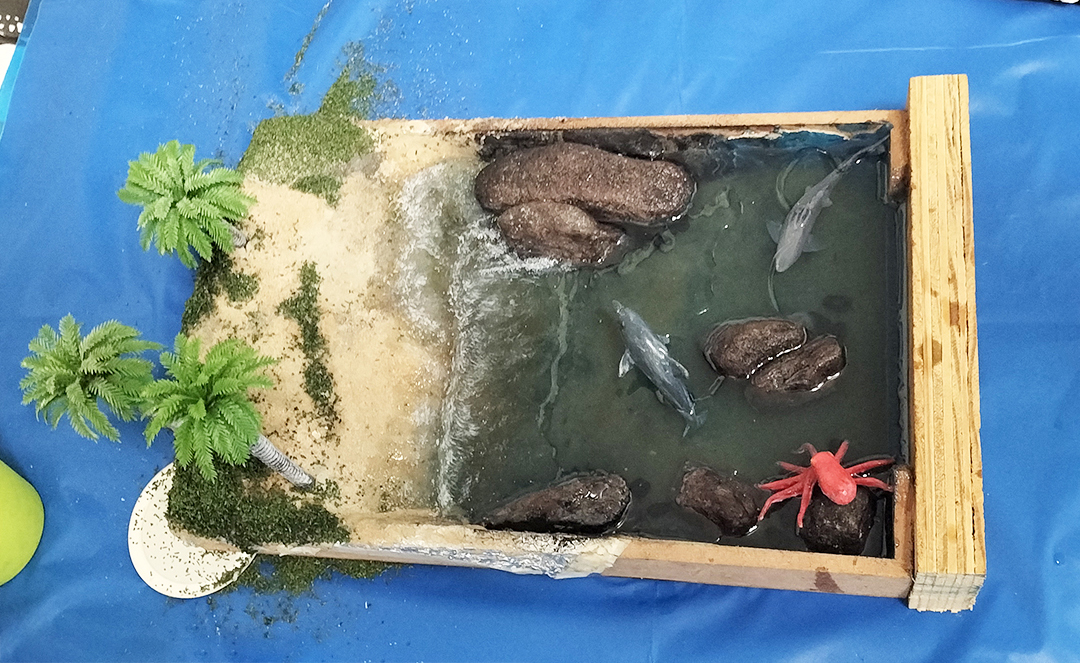
The approach of the ocean diorama
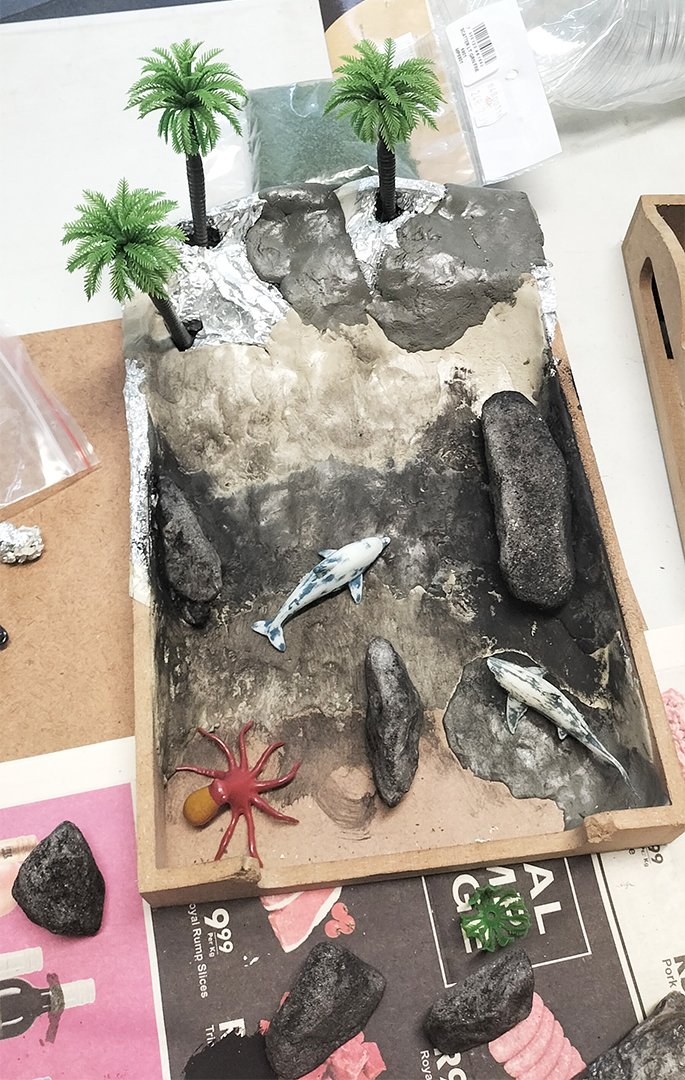 The
concept was to create an ocean cove whereby there was some marine life
interacting with the water. An old wooden tray was used as the base. To create
the expanded beachhead, tinfoil and newspaper were used to plot out the incline.
This was then taped into place.
The
concept was to create an ocean cove whereby there was some marine life
interacting with the water. An old wooden tray was used as the base. To create
the expanded beachhead, tinfoil and newspaper were used to plot out the incline.
This was then taped into place.
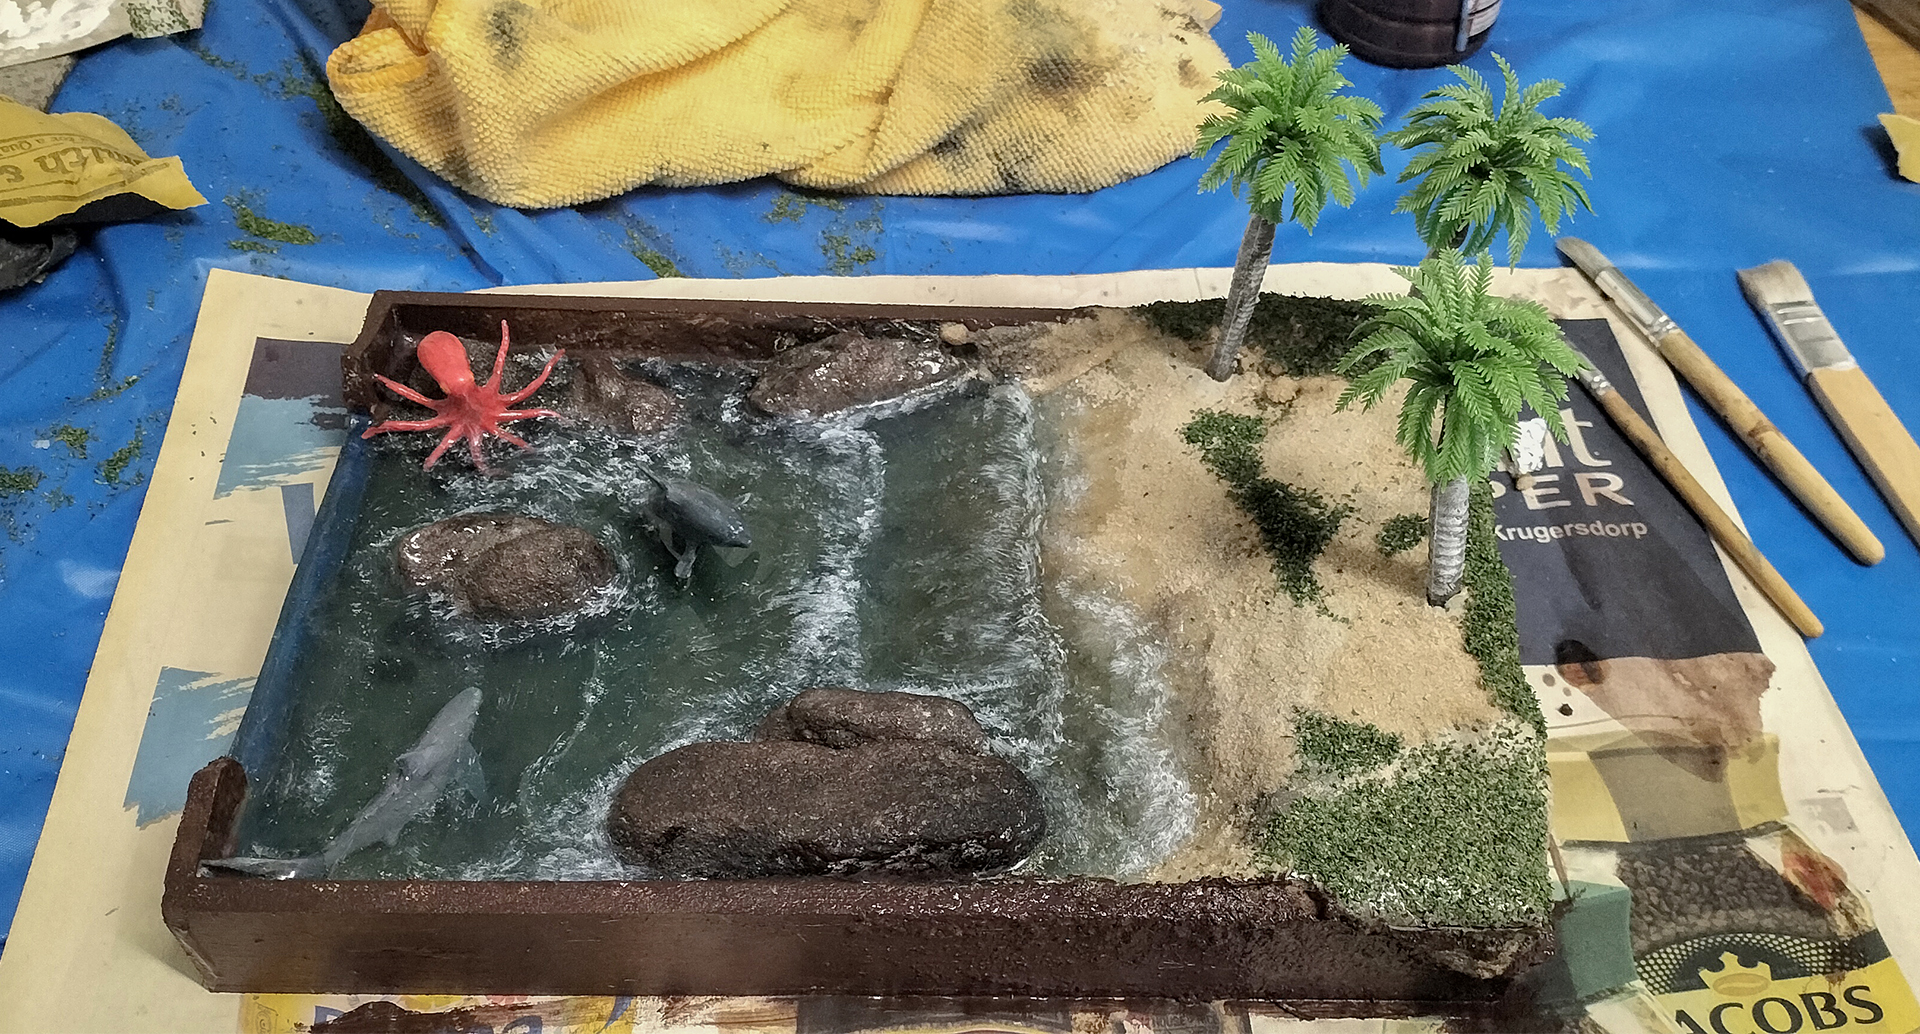
White rocks were painted brown and black to resemble ocean rocks. It was then worked out where to place them to best match the sketch created.
Left over Pratley Putties, Standard, Steel and Quickset®, were used to sculpt the beachhead over the tinfoil/newspaper shape. The newspaper and tinfoil were secured in place using masking tape.
Right: Trees were placed in position before Pratley Putty was used to secure them in place. The marine wildlife was loosely placed to see where best to place them.
The benefit of the Quickset® Putty was that it would set hard quickly allowing additional builds to be done on top of the applied layers once it had hardened. The colour of the Pratley Steel Putty gave a good base to apply a sand texture later in the project. Other sculpting mediums can also work.
We stuck rocks down into place with the various putties used. Additionally, Quickset® Clear was also used to set them in place.
Once the Putties had set creating the beach head, the tray was painted with a base of acrylic paint to blend the putty and tray into one single colour. In the deeper areas of the “ocean” darker colours were used to create an illusion of depth.
Marine animals were sanded down and repainted as desired.
Pratliglo® was then mixed with some sand and placed as the first layer at the base of the ocean. A single drop of acrylic ink was added to the Pratliglo® once mixed with the sand to tint the sand blue.
First pour of Pratliglo®
To create the first layer of the ocean Pratliglo® was mixed with a drop of blue ink to tint the “water” blue. The tray was angled slightly to allow the “water” to set at an angle. This method allowed for more Pratliglo® to set in a specific area as opposed to levelling out the entire surface at once.
Tip: It is advisable to start small and build up. Pratliglo® sets much faster than other epoxy resins and therefore can bubble quite easily especially if it there is a large amount in a small, contained area. With shallower pours, small bubbles can be controlled by either exhaling onto the bubbles or burning them off gently with a lighter.
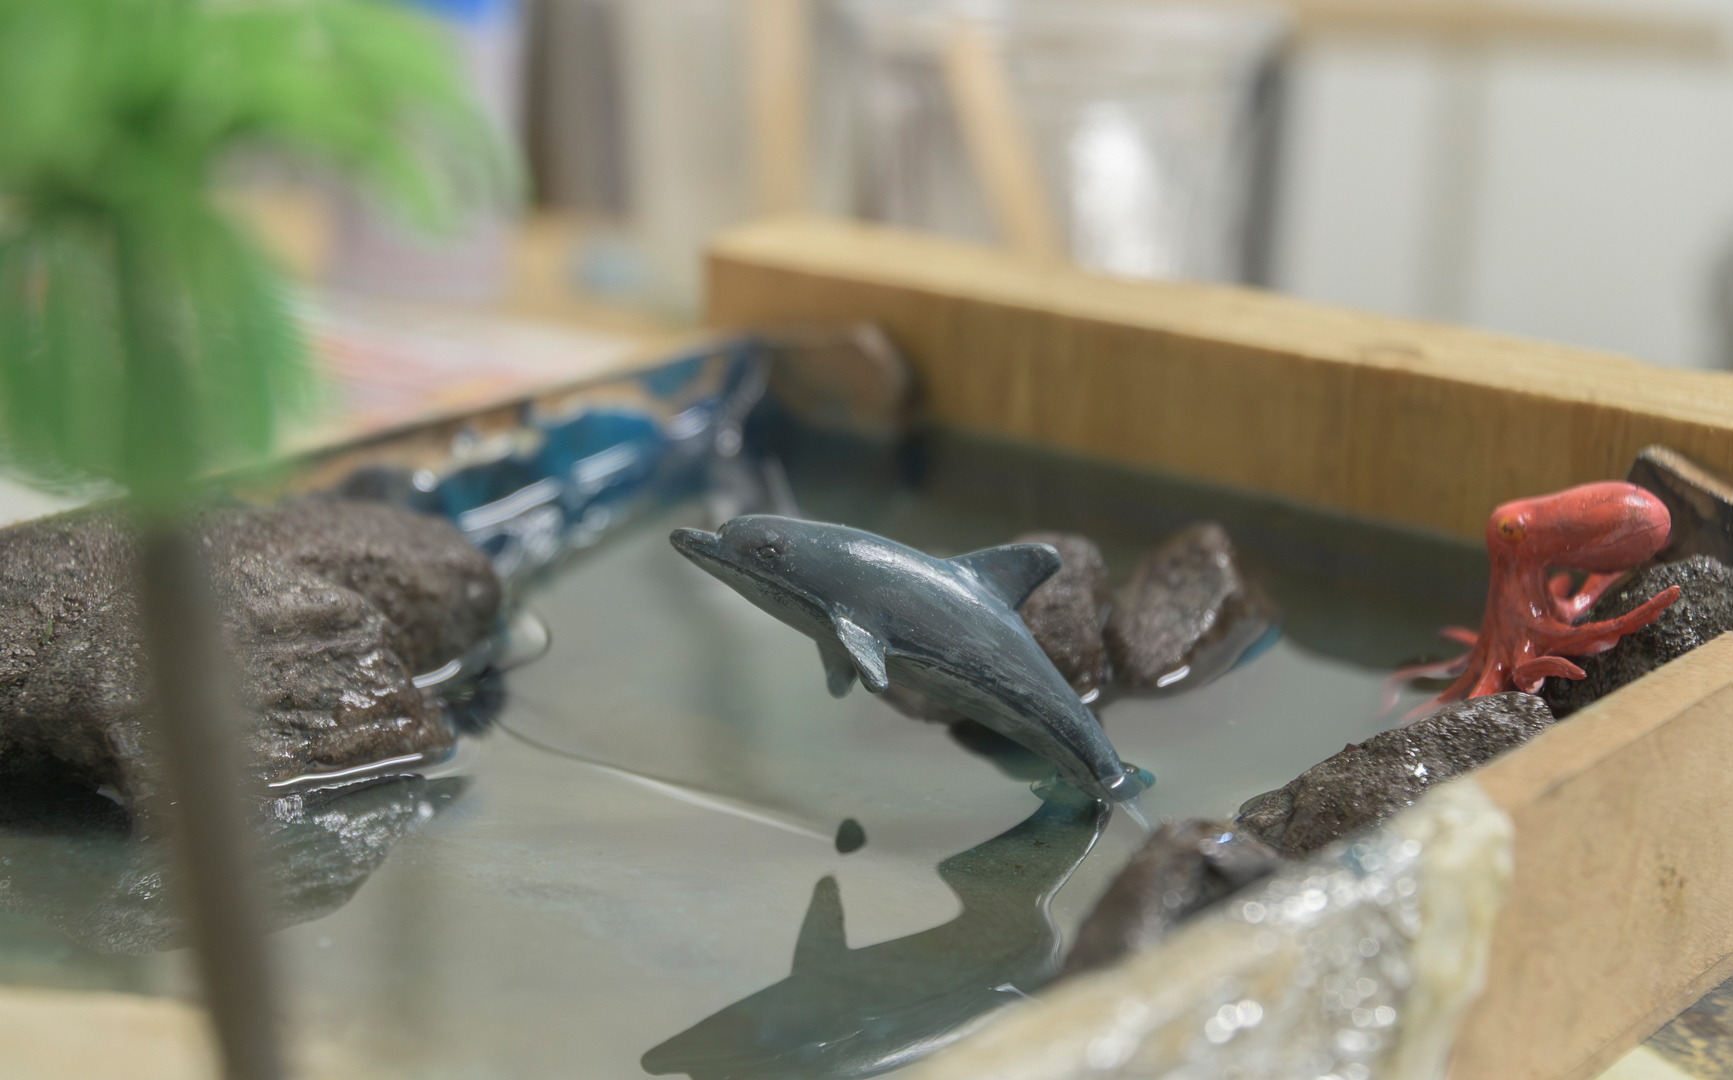
Placement of the dolphin
The first layer of the ocean was poured and set before the dolphin was placed. To ensure that the dolphin appeared as if it was coming out of the water, it was suspended over the tray using cotton tied to a stick. The height of the dolphin was adjusted to be at the desired height. A layer of Pratliglo® was poured and left to set. Once hard enough the cotton was cut off and the dolphin was stabilised in the Pratliglo®.
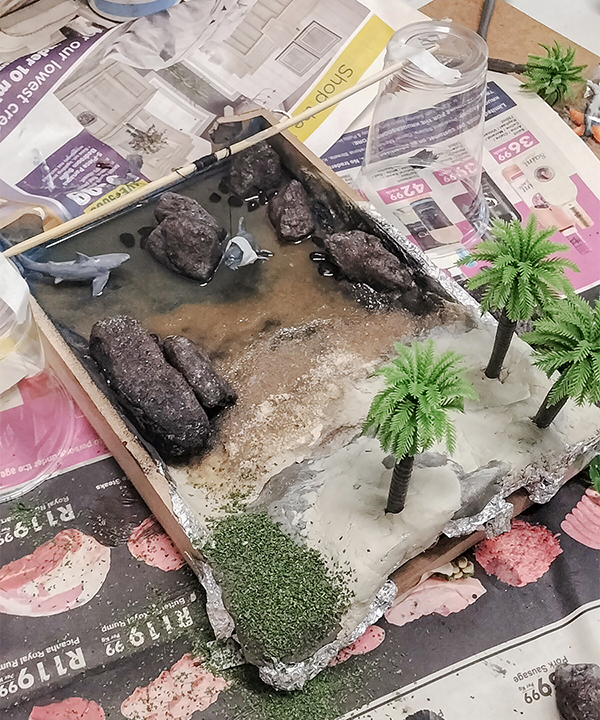
The dolphin was suspended in the Pratliglo® using a stick and cotton.
Some of the green scatter was applied by painting a layer of Decopodge® Sealant.
Whilst wet, the scatter was sprinkled over it securing it in place once it cured.
Tip: Ensure that the cotton attached to the item you are suspending is not submerged. This ensures that that cotton can be easily removed once the Pratliglo® has set.
The shark was also carefully placed in the resin using its fins to support it.
Accounting for the transparent section
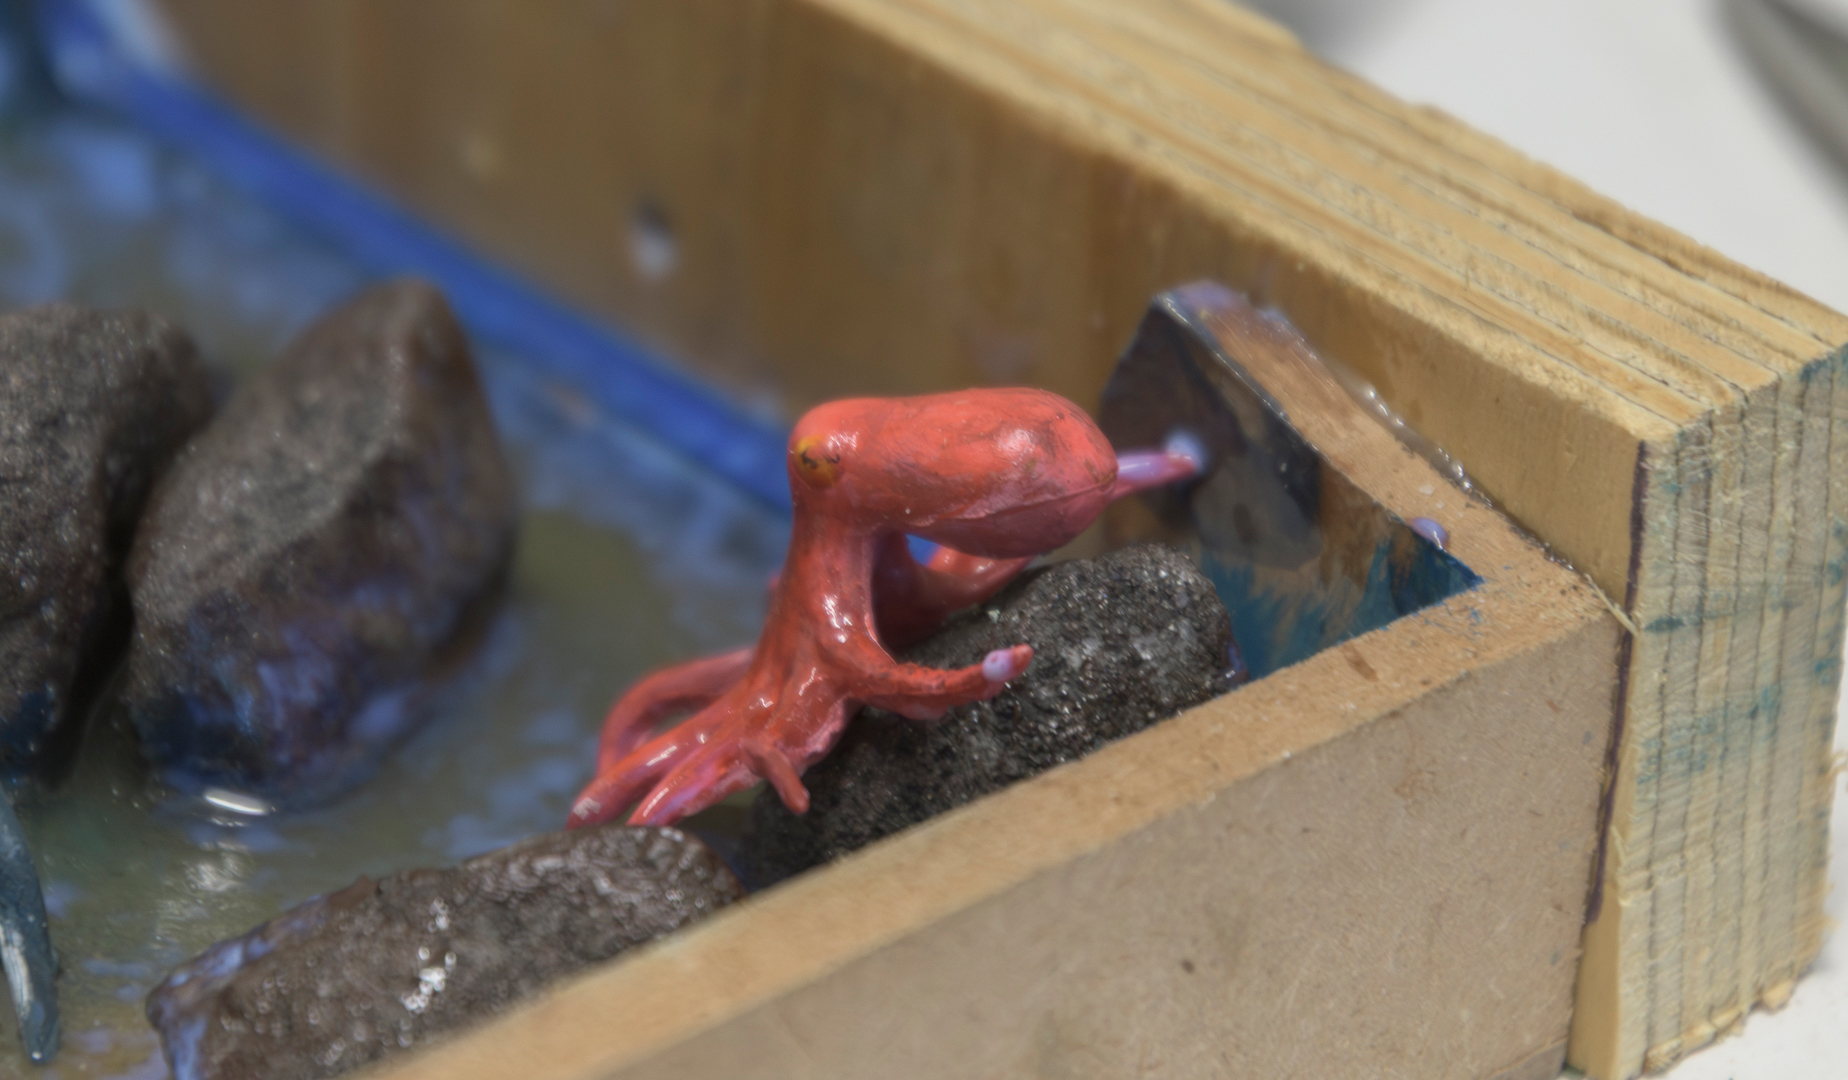
Before any additional pouring of Pratliglo® occurred, a piece of wood was affixed to the end of the tray. Both the pieces of wood and the tray were sanded and then stuck together with Quickset® Clear. Quickset® Clear sets hard in approximately 40 minutes, so once the wood was secured in place, Decopodge® Sealant was used to seal the wooden piece. Special attention was taken to ensure that any gaps between the tray and the piece of wood were sealed completely. This will prevent any Pratliglo® from escaping through any gaps and producing unforeseen bubbles during the curing process.
The wooden piece was attached with Quickset Clear and then sealed with Decopodge® Sealant.
The sealant was applied all the way to the planned water's edge.
Decopodge® Sealant was also used to seal other areas of the diorama where Pratliglo® would be applied. The octopus was also secured in place using Quickset® Clear.
Using Decopodge® Sealant as an adhesive
To create the illusion of sand on the beach head, Decopodge® Sealant was painted over the surface. Whilst it was wet, sand was sprinkled over it. The same method was used for the green areas but using the green scatter material as opposed to sand.
To prevent the green scatter from affecting the curing Pratliglo®, only the corners and back were worked on during the curing process.
Once the Pratliglo® had cured, other areas could have either sand or green scatter applied.
Tip: To save time, applying the sand and scatter this can be done while the Pratliglo® is setting. However, be careful not to let this material fall into the setting resin otherwise you run the risk of having unwanted sand or scatter in your set resin. It is easier to do this as a final touch or once layers of Pratliglo® have hardened.
Rinse and repeat
To create the illusion of different layers in the ocean and different waves, Pratliglo® was applied in small areas at a time. The tray was also placed at a slight anlge to allow the resin to run to a point before levelling out.
Tongue depressors/ice cream sticks were used to coax the Pratliglo® to the areas it was aimed to be. A small bit of Pratliglo® was poured out in the shape of the wave and then the tongue depressor was used to spread it out. Additional Pratliglo® was then poured until enough was used for the desired effect.
An example of the effect of tilting the surface when pouring the Pratliglo®. A clear line can be seen where the previous pour had stopped.
Tip: Use small flat objects to angle the surface. During this project various items were used to do this. A clipboard, small lids as well as other items were used. The most important thing is to ensure that however the surface is angled, that it will not move throughout the duration of the Pratliglo® cure time
The object under the tray helped angle the tray to give the waves a pull back effect whilst the Pratliglo® was setting.
Ripples using Decopodge® Sealant
Decopodge® Sealant was used to create a ripple effect on the water surface. This was achieved by using a small paint brush and very little Decopodge® applied to the brush. It was then worked onto the areas where the ripple effect needed to be applied.
Once the Decopodge® Sealant had cured and was transparent, white acrylic paint was used to enhance the white water effect of the water. A dry brush technique was used to get the effect.
Once the last applied layer of Pratliglo® was fully cured, the piece of wood was sawn off.
The sawn off section was then refined to get it as smooth as possible. It was first filed and then sanded. A 200 grit paper was first used and then finer grits, 800 and then 1000 grit were used.. To seal the surface a layer of Decopodge® Sealant was used. Clear Coat spray can also be used to seal the surface.
Due to the vibration of the sawing, filing and sanding lots of sand was displaced from the beach head. Sand can easily scratch the surface of the Pratliglo®. Therefore, careful attention was made to brush off the loose sand without scratching the surface.
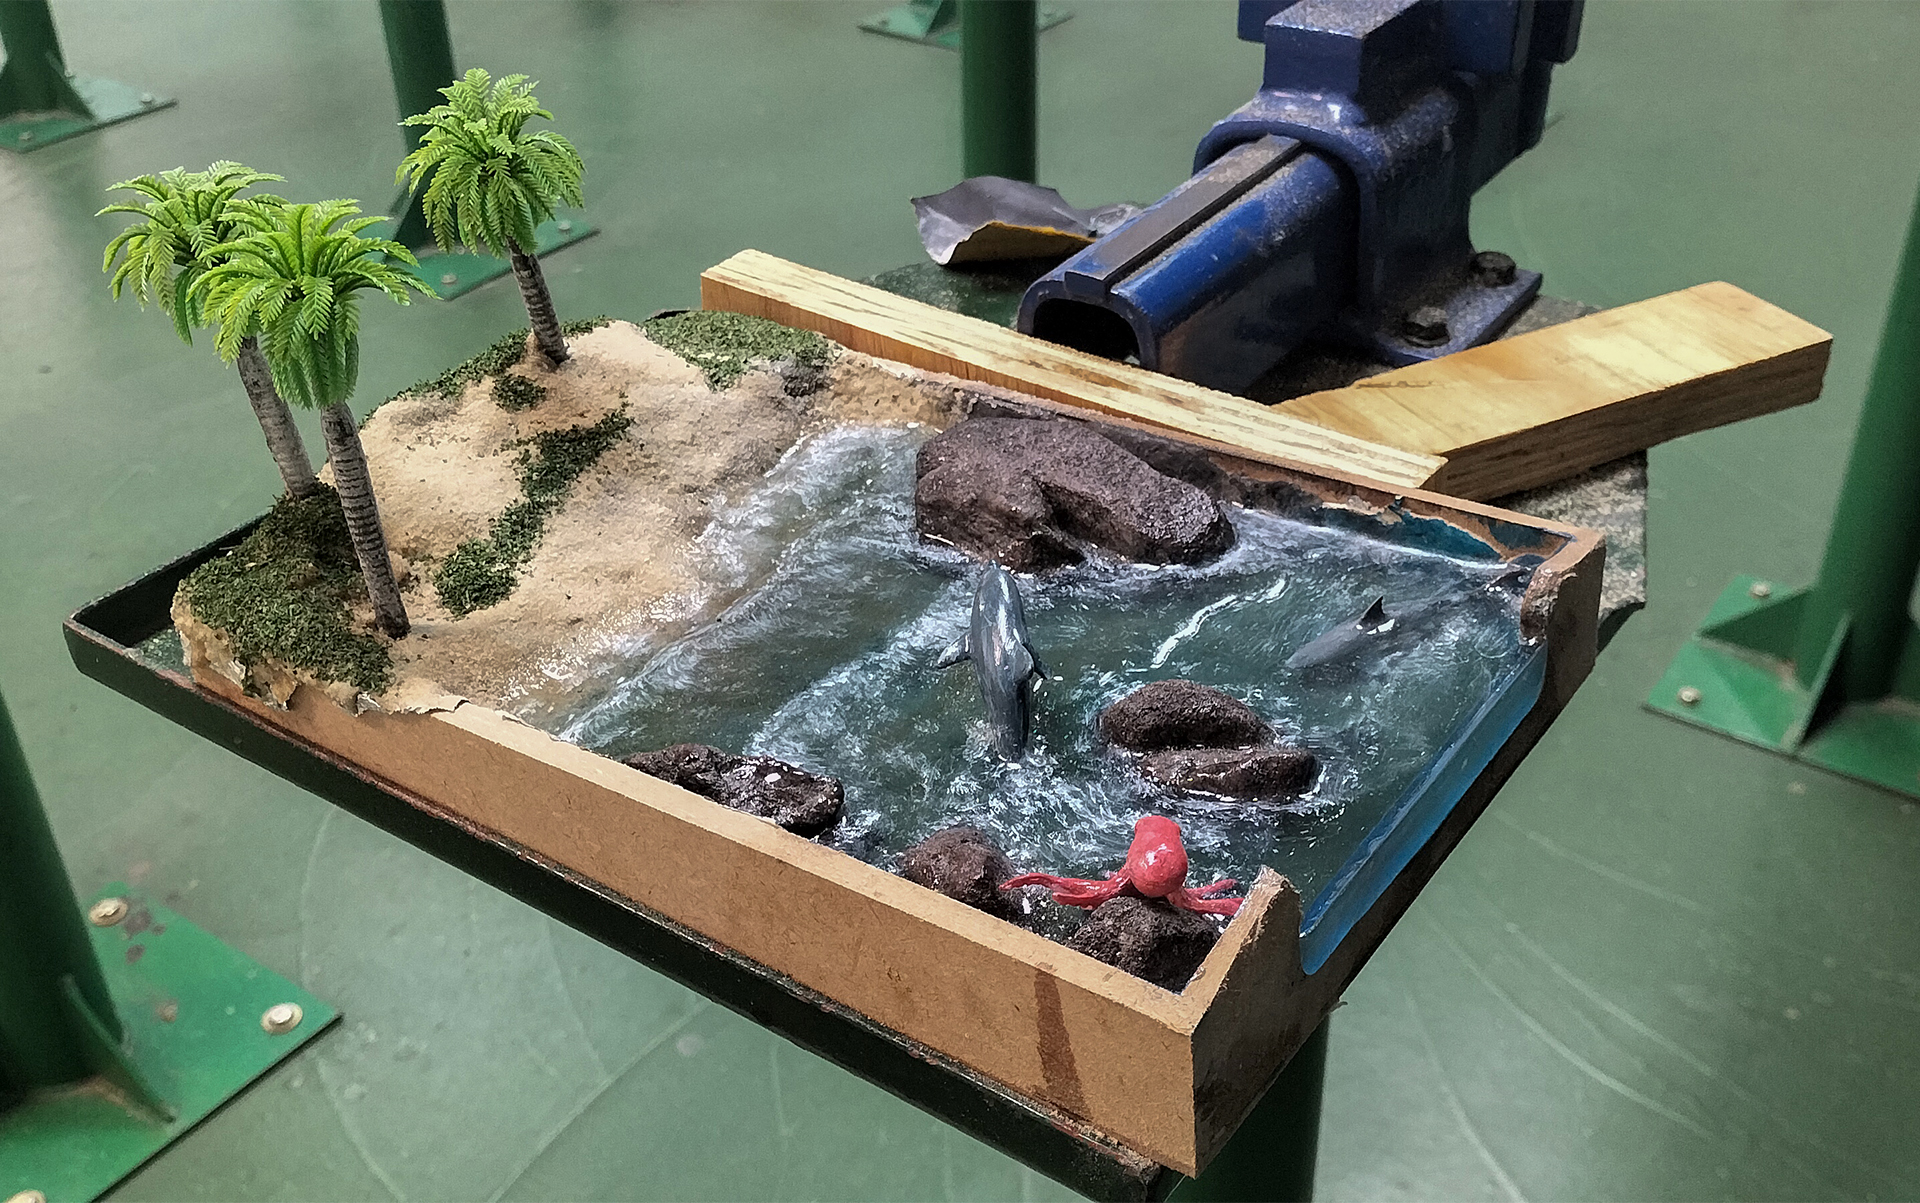
The final touch was to paint the base using an acrylic paint.
Final result
The entire project took approximately 5 days working an hour at a time. As attention needs to be applied to the setting and curing times of the products used, work had to be spaced out over a period of days. There was no way to rush the project. There is no doubt of achieving a certain satisfaction watching a project come together over a lengthy period of time. In the times away from a project like this, newer ideas can be explored and tested out with the Kraftex and adhesive products used. This not only helps to better one’s skill for future projects but opens the door to explore other products contained in the Pratley Kraftex and Adhesive range.